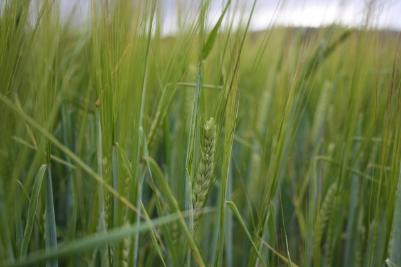
Spring Barley
Spring barley can be grown for animal feed or for malting to make beer and whisky. 1 ton of barley can feed 2 pigs for a year or help produce 7200 litres of beer. The seed is drilled in March/April (see below left) at 150kg/hectare or 15g/m2 (1 hectare =10,000m2 or 38 tennis courts).The soil needs to be dry and warming up after the winter for the crop to start growing. The barley will appear above ground after 7-10 days. The crop will receive a dose of fertiliser within a few weeks and also a fungicide to prevent diseases and a herbicide to kill weeds which would otherwise compete with the crop for nutrients and light. Average yield on light soils would be 5t/hectare with 60-70 small (18kg) bales of straw. In very dry years, yields have been half that because of the lack of rain.
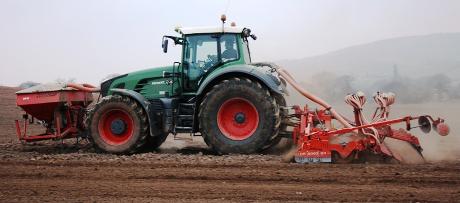
This 300hp Fendt tractor and power harrow combination drill is planting spring barley. The power harrow breaks up the soil ahead of the coulters which run in the soil and drop the seed in place. The seed is blown from the hopper on the front of the tractor to the back. Tramlines are marked in the soil to use as a guide when spraying pesticides.
Winter Barley
Similar to spring barley, it can be used in the manufacture of beer and whisky or as animal feed. It is planted from mid September to mid October and will grow a few inches before the winter. A herbicide is applied before the crop emerges. This is called a pre-emergent and ensures the barley starts growing in weed free soil. Too much growth and it can suffer from frost damage over the winter, too little and the plant may die off. A covering of snow actually insulates the crop against freezing temperatures. When it starts to warm up in the spring, those few inches of growth give it a head start of 4-6 weeks on any spring drilled crops. This means yields are higher and harvest is earlier. It receives 2 doses of fertiliser in March and a fungicide to prevent disease. Yields are 7 tons/hectare or equivalent to 8,750 loaves of bread.
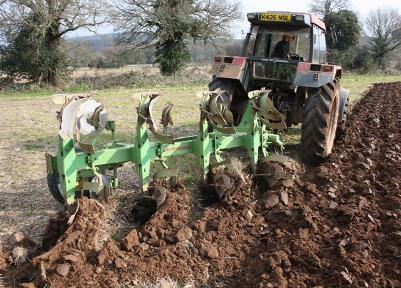
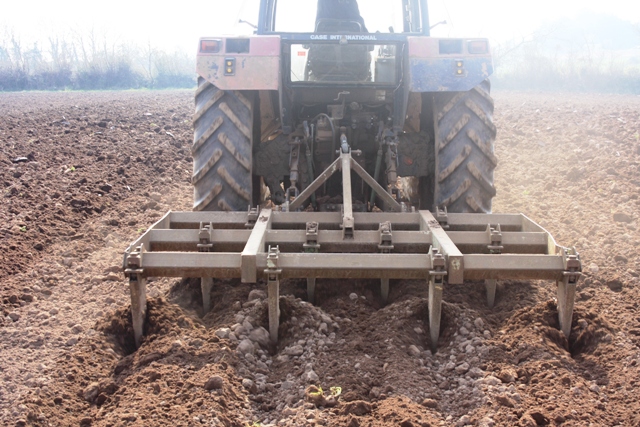
Ploughing before spring barley (left), notice how the curved metal furrows invert the soil and bury any weeds and surface trash. The chisel plough (right) has 2 uses. Working 15-20 cm deep it can shatter hard, compacted soil in very dry conditions. This is useful in a dry spring. The other use is it can cultivate to a depth of 50 cm creating good soil structure for deep roots. This keeps the land well drained and is essential for growing potatoes
Operations carried out for potatoes
1. Clear field of pigs, fences and pipes
2. Spray off weeds in field
3. Spread manure
4. Rotavate to mix in manure with soil
5. Deep plough to create a clean seedbed
6. Chisel plough twice – deep 2nd time
7. Bedform - raised 2 x metre ridges of soil
8. Destone - breaks up soil and removes stones
9. Plant potatoes
10. Spray herbicide to stop weeds growing
11. Irrigate – cover entire area 5/6times
12. Spray to protect from blight (a fungus that can kill all the leaves and then the plant will stop growing and can also cause the potatoes to rot – spraying may be needed up to 10 times in a bad (hot and humid) year
13. Cut or spray plants to kill them off for easier harvesting
14. Harvest
15. Grade (sort out different sizes, stones, soil and unsalable potatoes) and bag up
16. Sort out seed for next season
17. Store in cold store over winter
(Growing season mid march-mid September)
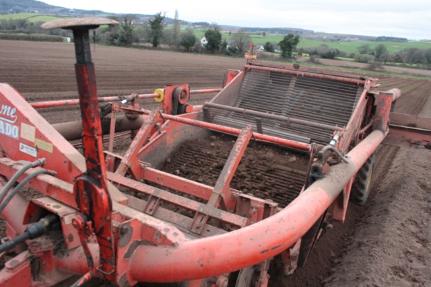
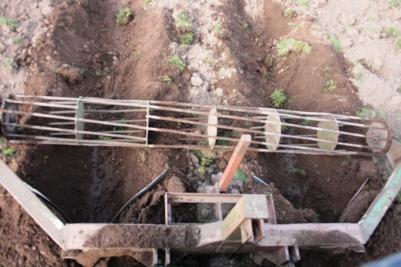
The Destoner removes stones from the bed and places them in the wheel marks. All the soil in the bed passes over the first web and 90% will fall straight back through. Stones and lumps of soil travel onto the second web where the soil is broken up to fall back onto the bed. The remaining rubbish falls onto the cross-conveyor which drops them between the beds. It leaves a bed with fine soil, perfect for growing root crops. Stones are removed so they don’t get harvested and damage the potatoes.
Manure and compost can be spread at up to 50 tons/hectare in order to improve soil structure and water retention thus preventing the risk of soil and nutrient run off after heavy rain. Manure and most composts will contain a few kg/ton of vital nutrients which means expensive artificial fertiliser rates can be reduced.
The bedformer banks up the soil to create a bed which will eventually be split into 2 rows. It is important to keep as straight a line as possible because all other operations will have to follow the same tracks. The tips of the 2 metal mouldboards need replacing regularly to make sure they dig deep enough into the soil. Not creating big enough beds creates problems for destoning, planting, the actual growing of the potatoes, irrigation and harvesting, so it is important to do the job right from the beginning.
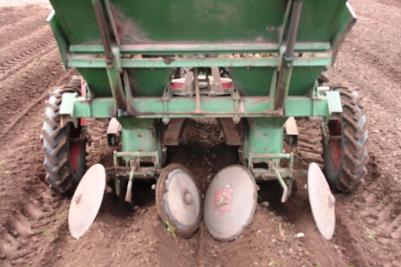
The planter uses its two wheels to drive rubber belts with seed cups fixed to them. The cups pick up the potatoes from then hopper and drop them in the soil then the discs cover them over. The intervals at which the seed is placed in the ground can be altered by using different sized cogs between the wheels and belt. This in turn drives the belt at different speeds. The hopper can carry about 400kg of seed and is on a hydraulic ram to tip it towards the cups. Seed is planted at a rate of 2.5tons/hectare, (1 potato/0.28m2), for main crops and 3.8tons/hectare, (1 potato/0.18m2) for early crops.
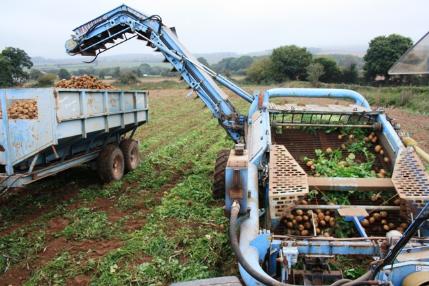
This trailed harvester can dig two rows at a time. The crop passes over the web with most of the soil passing through the gaps straight away. Early potatoes are harvested with the plant still attached which may break off on the harvester. If not they can help to cushion the crop as it travels through the harvester and into the trailer. The web can be adjusted to shake off more soil but this has to be balanced with the risk of damaging the potatoes. The rubber coils (above right) near the back, take out more soil and plants, and anything that is left is conveyed into the trailer. The trailer is later parked in the barn and uses a hydraulic belt to feed the crop into the grader. The web is powered by the tractor PTO. The conveyor, steering axle and web lift are powered by hydraulics.
Potato Varieties
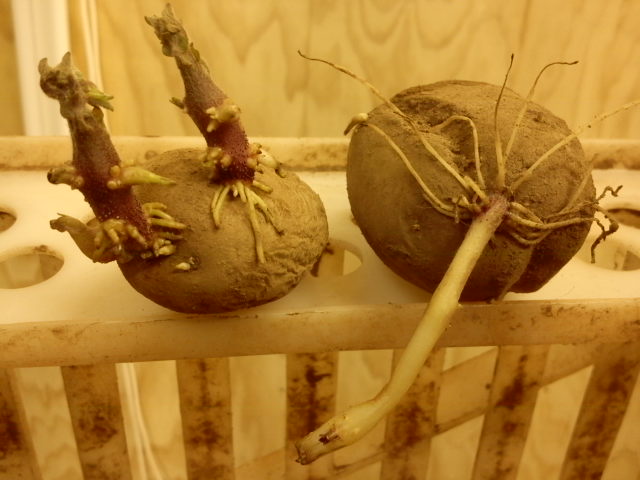
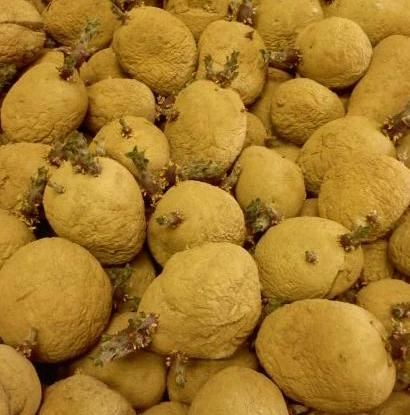
Early varieties (earlies) mature quicker than main crop but won’t yield as much. They are placed in chitting trays in the autumn and kept in warm, light conditions. This allows them to grow shoots before they are planted which gives them several days headstart. Soil conditions need to be dry and above 8°C for the seed to actually start to grow. There is a balancing act in order to get them in after the night frosts stop, but as soon as they can start to grow during the day. This is usually the middle of March and harvest can start in the middle of June. Early varieties include Premiere and Maris Bard for chipping and Rocket for general use. Yields can reach over 30 tons/hectare, enough to feed an average household for 50 years!
Main crop varieties don’t really benefit from chitting and are usually planted a few weeks later. They do the bulk of their growing in June/July so can require much more irrigating than earlies. Depending on how well blight has been controlled, they will keep growing into late August, albeit at a slower rate than earlies. Varieties include Maris Piper for chipping and Wilja, King Edward and Desiree for general ware. Yields can be 60 tons/hectare, equivalent to 125,000 portions of chips!
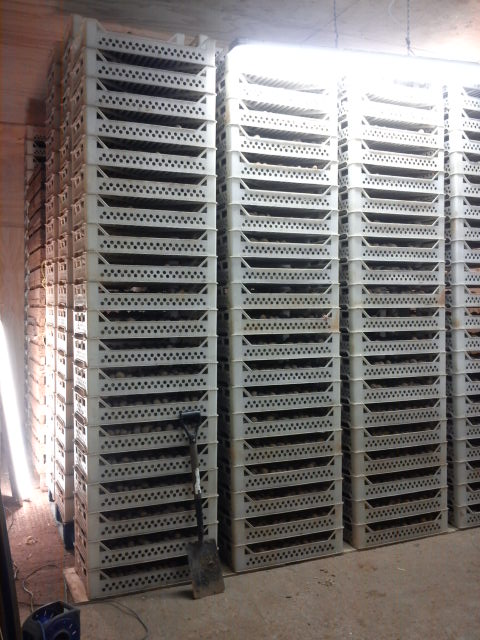
Keeping seed potatoes in chitting trays with constant light and and at a temperature above 5°c, enables them to grow small shoots, giving them a head start of about 2 weeks when they're planted in the field.